I CT FOR


I Am Protected

TWI Registered

UTR Registered

Network Blog
Follow Me To...
3/05/2012
 ♥New Tag N Tut - I'm Not Broken♥
THIS TUTORIAL WAS WRITTEN FOR THOSE WITH A GENERAL WORKING KNOWLEDGE OF PSP
SUPPLIES:
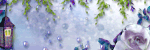
TUBE OF CHOICE: I am using the beautiful artwork of Zindy S. D. Neilsen You must have a license to use this work. To purchase her tubes and/or obtain a license, visit her store here...Zindy Zone Shop
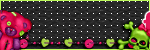
SCRAP KIT OF CHOICE: I am using a gorgeous kit called I'm Not Broken by Tonya. You can check out her site here...Broken Sky Dezine & you may purchase her kits at multiple stores. There are quite a few, so instead of posting them here, just check out her blog on the left hand side & you will find a list of stores.
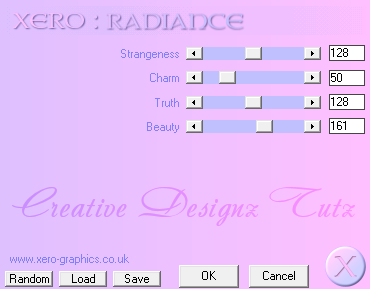
EFFECTS OF CHOICE: I am using the effects Xero-->Radiance. If you do not have this, you can get it...HERE Go down to where it says Freeware Plug-Ins 2009, next to that it says download, with that you can download the entire program or you can go below & click on each individual effect you want. I suggest the full program, it has some great effects. I also used Eye Candy 4000-->Gradient Glow, which you can Google for free download if you don't have it.
FONT OF CHOICE: I am using a beautiful font called Aquarelle, if you do not have it you can get it here... FONTS101 & I used Ariel for the copyright. You should have that in your PSP already.
OK, LET'S GET STARTED:
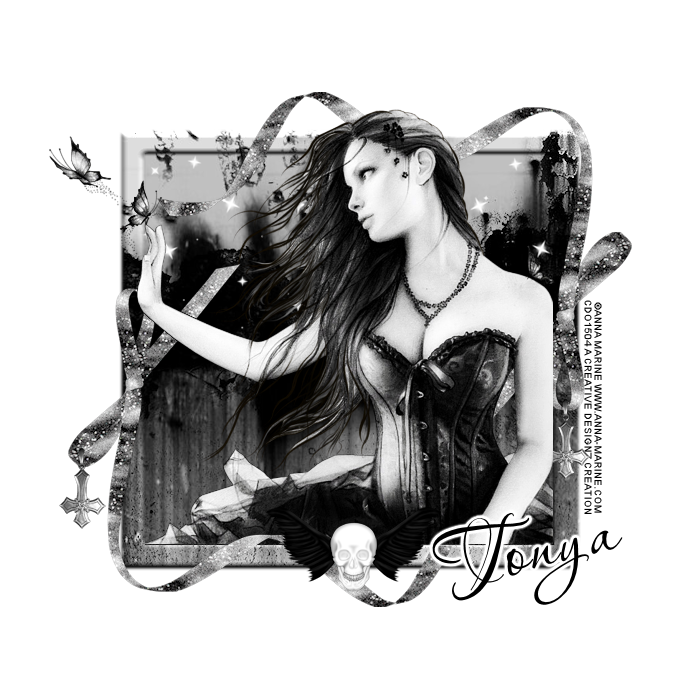
Open a new raster image, 700 X 700
Open BSD21, the square frame, & resize 80%, copy & paste onto new image.
Open Paper BSD5 & resize 80%. Copy & paste onto tag under frame layer. The paper should line up perfectly with the frame. Make sure your frame is the active layer & click inside with your magic wand. Go to image-->modify-->expand & expand by 5. Go to selections-->invert. Make sure your paper is the active layer in the layer palette, if not, click on it. Hit delete on your keyboard. Go to selections-->select none.
Open BSD51, stars, & paste on top of paper layer but under frame. I moved to the left side, right click on your mouse w3ith the pointer above the star layer i your layers palette & click duplicate. Go to image-->mirror.
Adjust if needed.
Open BSD56, the gray ribbon, & resize 80%. Copy & paste on top of frame layer. Position in left bottom corner. Duplicate, go to image-->mirror, then image-->flip. Position in top right hand corner. On the bottom ribbon I erased a part of the end of the ribbon to meet flush against the edge of the frame. See my tag for reference if needed. I did this because the bottom ribbon will be above the tube & the top will be under.
Open your tube of choice. I added a radiance effect.
Go to effects-->plug-ins-->xero-->radiance & click ok after you add these settings...
Now, Copy & paste onto your tag. If you need to, click on your tube in the layers palette & drag it so it is above the top ribbon & below the bottom ribbon. You may need to move the ribbon layers around a bit to do this.
Open BSD60, the skull with wings, Resize 30%, Copy & paste onto tag on top layer & place in the bottom center of the frame. It should be above the tube & ribbon layers.
Now open the last element, BSD6 & Resize 20%. Copy & paste onto tag. I placed in the curve of one of the ribbons, duplicate & place on the other ribbon.
Add any other elements you like. I kept this simple I know, but I tried adding some of the colored elements to it, but just didn't like it. I like it better with the black & white look.
If you are happy with it, you can add your name & copyright info. Make sure this is legible & clear. You may add any drop shadow to any layers you like & merge layers together if that is something you do.
That is it. I hope you enjoyed my tutorial. Thanks so much for checking it out.
♥HuGz♥MsJess♥
Open BSD51, stars, & paste on top of paper layer but under frame. I moved to the left side, right click on your mouse w3ith the pointer above the star layer i your layers palette & click duplicate. Go to image-->mirror.
Adjust if needed.
Open BSD56, the gray ribbon, & resize 80%. Copy & paste on top of frame layer. Position in left bottom corner. Duplicate, go to image-->mirror, then image-->flip. Position in top right hand corner. On the bottom ribbon I erased a part of the end of the ribbon to meet flush against the edge of the frame. See my tag for reference if needed. I did this because the bottom ribbon will be above the tube & the top will be under.
Open your tube of choice. I added a radiance effect.
Go to effects-->plug-ins-->xero-->radiance & click ok after you add these settings...
Open BSD60, the skull with wings, Resize 30%, Copy & paste onto tag on top layer & place in the bottom center of the frame. It should be above the tube & ribbon layers.
Now open the last element, BSD6 & Resize 20%. Copy & paste onto tag. I placed in the curve of one of the ribbons, duplicate & place on the other ribbon.
Add any other elements you like. I kept this simple I know, but I tried adding some of the colored elements to it, but just didn't like it. I like it better with the black & white look.
If you are happy with it, you can add your name & copyright info. Make sure this is legible & clear. You may add any drop shadow to any layers you like & merge layers together if that is something you do.
That is it. I hope you enjoyed my tutorial. Thanks so much for checking it out.
♥HuGz♥MsJess♥
Subscribe to:
Post Comments (Atom)
My Blinkie


0 comments: